Whether it be PowerPoint presentations, spreadsheets, or other important files, Zoom allows for convenient and quick file sharing. Follow our step-by-step guide to learn how to send documents and screen share on Zoom.
Uploading Files to the Meeting Room
To upload files to the meeting room, follow these steps:
Step 1: During a Zoom meeting, locate and click on the "Chat" button.
This button is usually found at the bottom of the Zoom window.
Image Source: Zoom
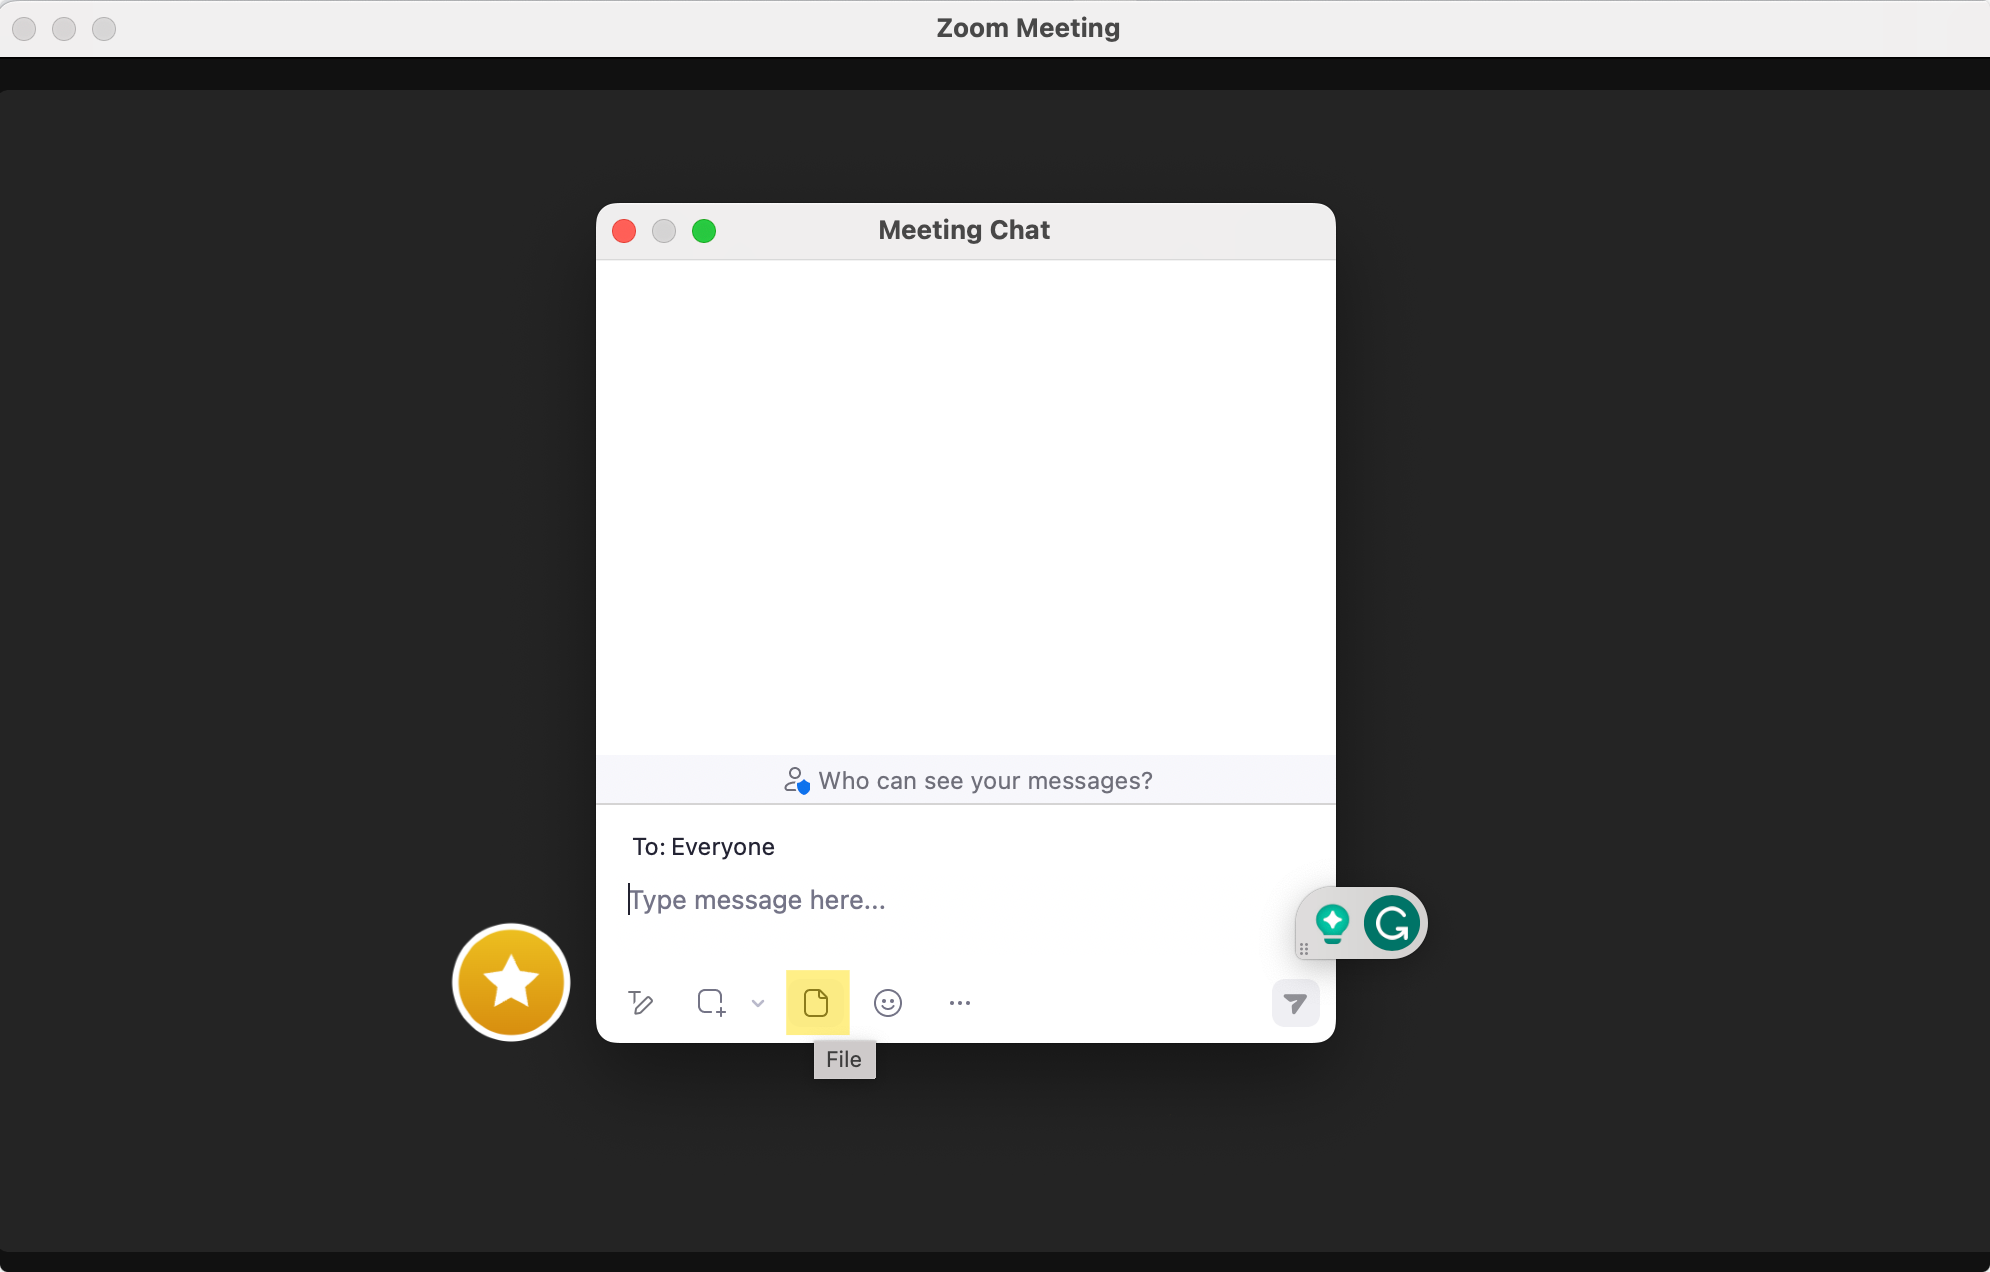
Step 2: Once the chat window opens, you will see a row of icons at the bottom of it.
Look for the "File" button, which is often represented by a document or paperclip icon.
Step 3: Click on the "File" button, and a file explorer window will appear.

Image Source: Zoom
Step 4: Browse your files and select the file you want to send to the meeting room participants.
Note that you can only select files from One Drive, Google Drive, Box, and Microsoft SharePoint.

Image Source: Zoom
Step 5: The chat will notify all meeting room participants that a file has been uploaded.
Participants can then click on the notice to download the file onto their own computers.
Using Cloud-based File Sharing Services
Cloud-based file-sharing services can easily integrate into Zoom meetings to enhance collaboration and securely share files among meeting participants.
Below are the steps to utilize these services in Zoom:
Step 1: Sign up and select a reliable cloud-based file-sharing service.
This integrates with Zoom and platforms like Google Drive, Dropbox, or Microsoft OneDrive.
Image Source: Zoom
Step 2: Sync the chosen file-sharing service with your Zoom account.
Access the Zoom settings and integrate the service within the "Integration" or "Third-party apps" section.
Step 3: When scheduling a Zoom meeting, enable the file-sharing feature by checking the appropriate option in the meeting settings.
This ensures that meeting participants have access to the shared files during the meeting.
Step 4: Before the meeting starts, upload the relevant files to the cloud storage provided by the integrated service.
This can be done by logging into the synced account and dragging or uploading the files directly.
Step 5: During the Zoom meeting, click on the chat or file-sharing icon to access the shared files pane.
Here, the uploaded files can be easily accessed, previewed, or downloaded by meeting participants.

Screen Sharing and File Transferring on Zoom
Two key functionalities that Zoom offers are screen sharing and file transferring. Screen sharing allows participants to share their computer screens, enabling real-time collaboration and visual presentations.
Launching Screen Sharing Mode in Zoom
To launch the Screen Sharing Mode in Zoom, follow these simple steps. Firstly, open the Zoom application on your computer. Once the Zoom window is open, you will find a green "Share Screen" button at the bottom of the window.
Clicking on this button will initiate the Screen Sharing Mode. As soon as you click on the button, several meeting control options will appear at the top of the screen. These options allow you to control your screen-sharing session effectively.
Image Source: Zoom
The options typically include the ability to pause or stop the screen sharing, switch between different screens or applications you want to share, annotate on the shared screen, and even give remote control of your screen to other meeting participants.
These meeting control options enhance your collaboration and sharing experience during Zoom meetings. They allow you to control what and how you share, making it convenient for both presenting and collaboration purposes.
For a helpful guide, you can also check our resume resource on How to Create a Zoom Meeting.

Using PDF Reader Pro with Zoom
Preparing a PDF for a Zoom meeting using PDF Reader Pro can help you present your document effectively and engage your audience more interactively. Here are some practical ways to prepare your PDF using PDF Reader Pro before presenting it in a Zoom meeting:
1. Optimize the Document Layout
- Adjust Zoom Level: Set the default zoom level so that the content is displayed clearly and appropriately when you open the PDF during the meeting.
- Organize Pages: Rearrange or delete unnecessary pages to ensure the document is concise and focuses only on relevant information for the meeting.

2. Enhance Readability
- Increase Font Size: Enlarge text for easier reading, especially important for viewers on smaller screens.
- Use High-Contrast Colors: Modify colors to enhance visibility, ensuring that text and background colors have high contrast.
3. Annotate for Emphasis
- Highlight Key Points: Use the highlighting tool to draw attention to significant data or quotes that you plan to discuss.
- Add Comments: Insert comments or notes to specific sections as cues for yourself or to prompt discussion during the meeting.

4. Create Interactive Elements
- Add Links: Include hyperlinks to external websites for additional resources or to internal document sections for easy navigation.
- Embed Videos: If PDF Reader Pro supports embedding multimedia, add short clips directly into the PDF to make your presentation more dynamic.
5. Incorporate Visual Aids
- Insert Images and Charts: Add relevant graphical data like charts, graphs, and images to support your points and make the presentation more engaging.
- Use Shapes and Callouts: Include arrows, circles, or callouts to pinpoint specific document parts or to illustrate a process.

7. Prepare for Sharing
- Compress PDF: Reduce the file size for easier sharing via email or cloud services without compromising the quality.
- Save and Test: Always save changes and open the document to ensure all modifications appear as expected.
6. Secure the Document
- Password Protect: If the document contains sensitive information, use PDF Reader Pro to encrypt it with a password before sharing.
- Restrict Editing: Limit editing capabilities to prevent modifications before or during your presentation.

8. Practice Presentation
- Run Through: Open the prepared PDF in PDF Reader Pro and practice your presentation flow. Ensure you can smoothly navigate between pages, open links, and manage any embedded content.
FAQs About Sharing Files on Zoom
Can participants edit the document in real-time?
No, participants cannot edit the original document. They can view real-time annotations, but changes made by participants do not affect the original file.
Can I switch between multiple PDFs during a Zoom meeting?
Yes, you can switch between PDFs or documents in PDF Reader Pro, and Zoom participants will see the changes.
Are annotations saved in the PDF after the meeting?
Yes, annotations made during the Zoom meeting using PDF Reader Pro can be saved to the original PDF file.
Can I use PDF Reader Pro's annotation tools as a pointer in Zoom?
Yes, you can use the annotation tools in PDF Reader Pro as a pointer or to highlight specific elements while sharing your screen in Zoom.


 Free Download
  Free Download


 Support Chat